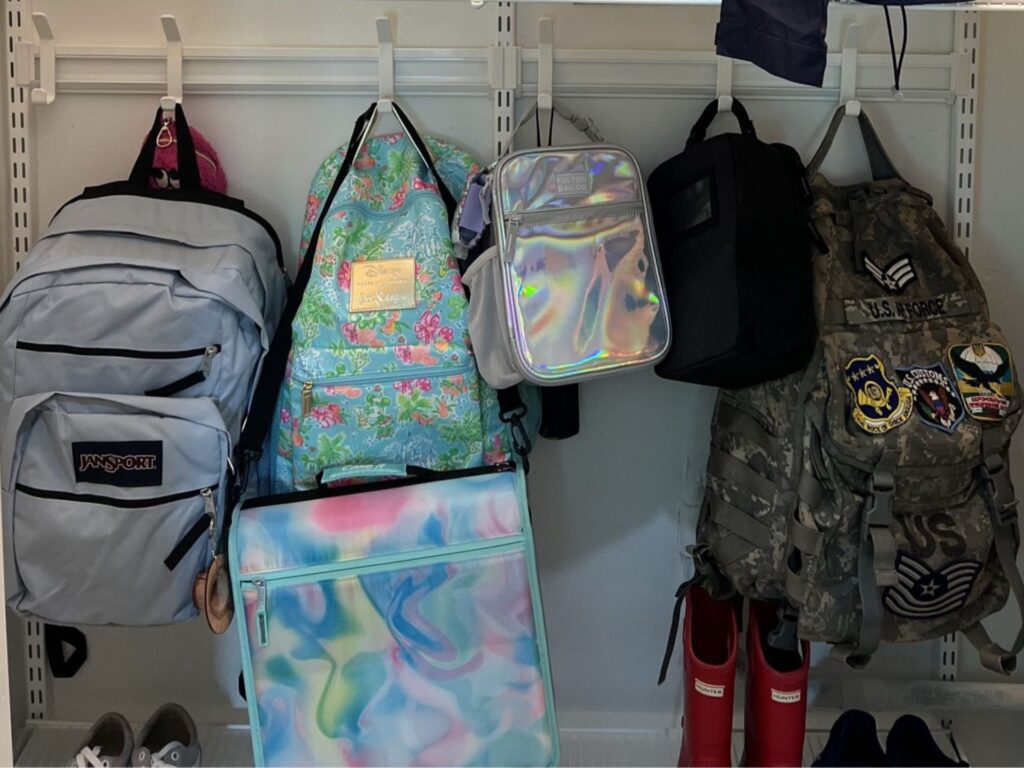
Whether you’re heading to school, embarking on a weekend hike, or simply commuting to work, a reliable backpack is your go-to companion for keeping essentials safe and organized. Yet, one small component often determines whether your backpack stays functional: the zipper.
From sudden jams to broken sliders, a faulty zipper can turn a stress-free day into a frustrating ordeal, especially when you’re left scrambling to secure your belongings.
That’s where knowing how to fix a zipper on a backpack becomes invaluable. In this guide, we’ll walk you through common zipper issues, the tools you’ll need, and step-by-step solutions to get your backpack back in action, saving you time, money, and the hassle of unnecessary repairs.
Fixing Common Backpack Zipper Issues
Repairing a backpack zipper often depends on identifying the specific problem, but most issues—from jams to broken sliders—can be resolved with a systematic approach.
Below, we break down the process for two of the most frequent scenarios: a stuck zipper and a detached slider, with tips for adjusting or replacing damaged teeth along the way.
Scenario 1: The Zipper Is Stuck (Won’t Slide Up or Down)

Step 1: Identify the Blockage
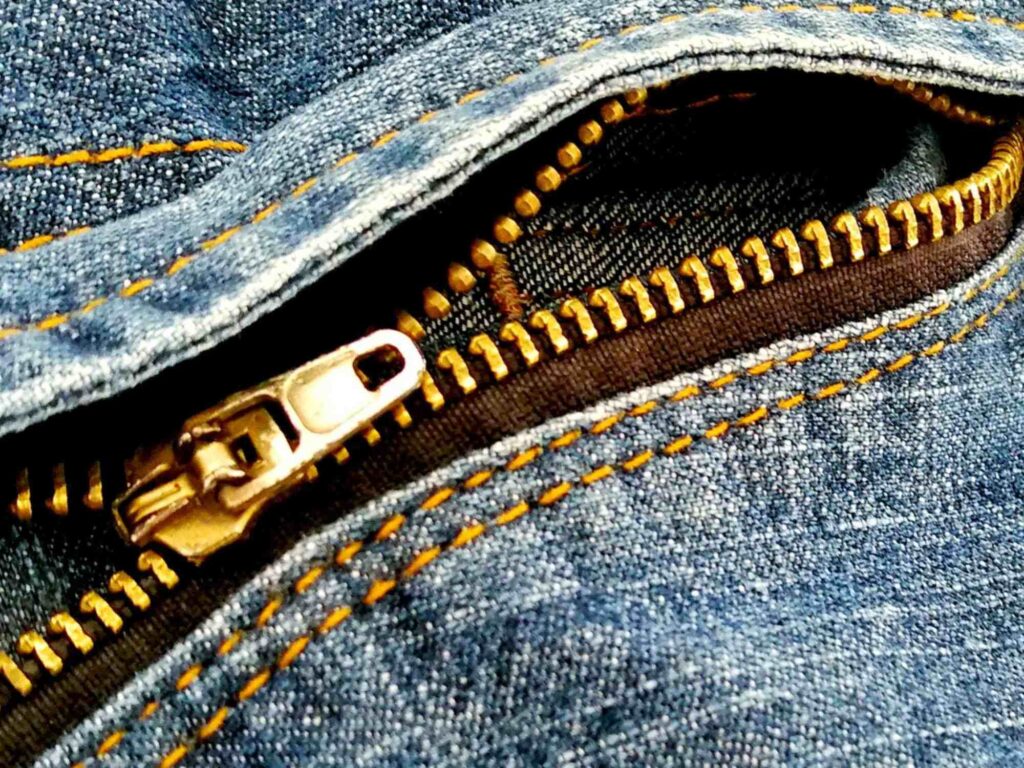
First, examine the zipper teeth and the area around the slider. Common culprits include dirt, lint, thread snags, or even a small object (like a seed or button) lodged between the teeth.
For metal zippers, use a flashlight to spot debris; for nylon/plastic zippers, gently run a finger along the teeth to feel for rough spots.

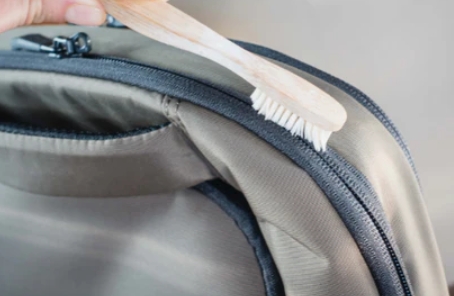
Step 2: Clear the Obstruction
Use a soft-bristle toothbrush, a needle, or a toothpick to carefully dislodge the blockage.
For stubborn debris (e.g., hardened mud), dampen a cotton swab with water, wringing out excess moisture, and gently wipe the teeth. Avoid soaking the zipper (especially metal ones) to prevent rust.

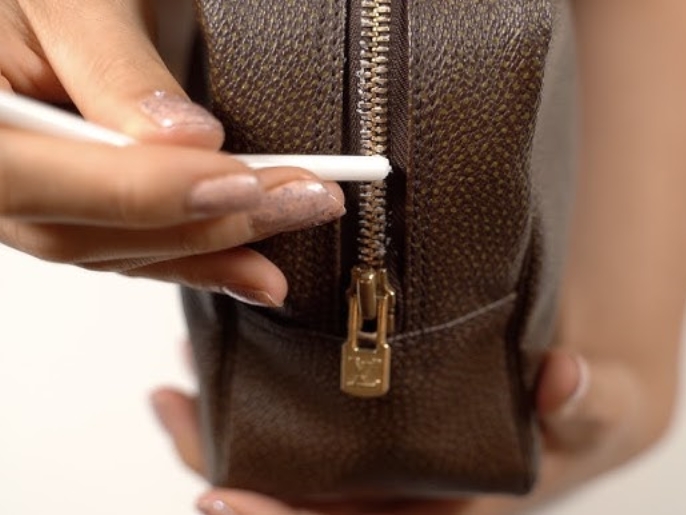
Step 3: Lubricate the Teeth
Apply a small amount of lubricant to the teeth and the slider’s inner grooves. For metal zippers, WD-40 or a silicone-based spray works well; for nylon/plastic zippers, use a beeswax stick, soap, or cooking oil (avoid petroleum-based products, which can degrade plastic).
Rub the lubricant into the teeth with your finger, then gently rub the slider back and forth over the teeth to spread the lubricant.

Step 4: Adjust Misaligned Teeth
If the teeth are bent or misaligned (common after forceful zipping), use needle-nose pliers to carefully straighten them.
Grip the base of a bent tooth (near the slider) and apply light pressure to straighten it—avoid bending it too far, as this weakens the metal. For nylon teeth, use your thumbnail to press them back into place.

Step 5: Test the Zipper
Slowly zip the backpack up and down, checking for smooth movement. If it still sticks, repeat steps 2–4, focusing on any remaining rough spots. If the slider feels loose, skip to Scenario 2.
Scenario 2: The Slider Has Detached (Won’t Grip the Teeth)

Tools Needed
Metal pliers (or needle-nose pliers), scissors, nylon sewing thread (or thread matching the backpack’s material), sewing needle, and auxiliary tools (e.g., a small screwdriver or hard card for gently pushing zipper teeth).

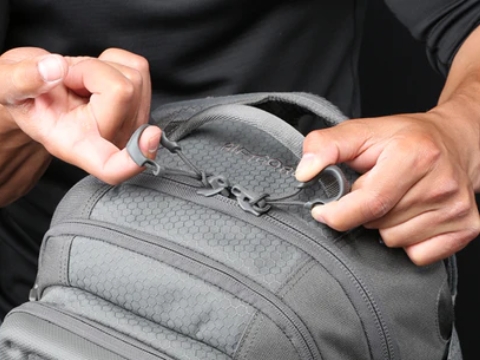
Step 1: Pry Open the Metal Slider
- Place the fallen metal slider flat on a table.
- Use metal pliers to gently clamp the slider’s “grooves” (the slots where the slider engages with zipper teeth) and slowly pry it open.
- Avoid excessive force to prevent deforming or flattening the slider, which could hinder proper engagement with teeth.

Step 2: Attach the Slider to One Side of the Zipper
- Take one side of the zipper (start from the bottom).
- Align the zipper teeth with the slider’s “guide groove” (the V-shaped notch at the front of the slider that directs teeth into place).
- Press the slider down to wrap it around the single side of the zipper teeth (if the teeth are tight, use a small screwdriver or hard card to gently push the root of the teeth into the slider’s groove).

Step 3: Merge Both Zipper Sides and Close the Slider
- Keep the single-sided zipper aligned with the slider, then bring the other side of the zipper close, ensuring both sets of teeth are perfectly aligned (no misalignment or crossing).
- Use metal pliers to gently clamp the top of the slider (where the slider connects to the zipper tape) and slowly close it.
- This allows both sides of the zipper teeth to bite into the slider’s grooves simultaneously, with a “click” sound indicating successful engagement.

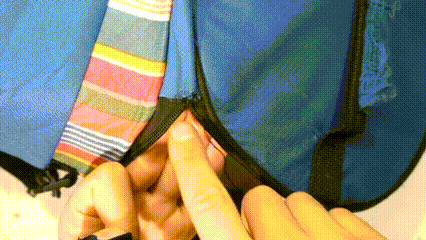
Step 4: Stitch the Zipper End to Secure the Slider
- Zip the zipper up to about 2-3cm from the end (leaving a small gap).
- Thread a sewing needle with nylon thread (use double strands for added strength) and insert it from the inside of the backpack through the gap between the zipper tape and the slider’s bottom edge.
- Stitch 3-4 tight loops along the edge where the slider meets the tape (focus on securing the slider’s front and sides to prevent shifting).
- Knot the thread and trim excess.
Step 5: Add Fabric Reinforcement (Optional but Recommended)
- If the area where the slider meets the backpack is thin (prone to loosening from pulling), cut a 2-3cm square of fabric (matching the backpack’s lining or exterior color) and place it over the stitched area.
- Use a hidden stitch to sew the fabric to the inside of the backpack (ensure stitches are tight but not visible).
- This reinforces the slider’s attachment and reduces the risk of future detachment.
Test and Check
After installation, zip and unzip the zipper 5-10 times to test smoothness. If the teeth engage tightly without misalignment or looseness, the repair is successful.
Repair Failed? Here’s What to Do
If your repair attempts still leave the zipper non-functional, it might be time to consider other options. Below is a simplified guide to handling unfixable zipper issues:
1. Decide if It’s Worth Fixing

Replace or retire the zipper if you notice any of these:
- Severe slider damage (cracks, broken springs, or detached clamps);
- Over 30% of teeth are broken, bent, or missing (especially in the middle or top);
- Internal track deformation (bent metal rails, torn nylon tracks);
- Persistent jamming even after thorough cleaning and lubrication.
2. Replace the Zipper Yourself (For DIY Enthusiasts)
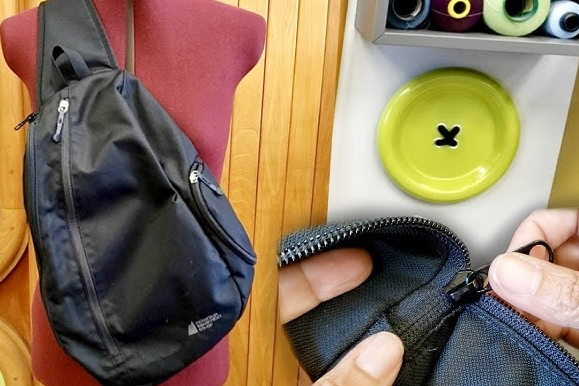
- Measure: Remove the old zipper and note its length, type (metal/nylon), and slider style (standard, two-way, etc.).
- Buy: Purchase a new zipper that matches the size, type, and slider style (check craft stores or online retailers).
- Install: Align the new zipper with the backpack’s original stitching marks, then secure the top/bottom stops with a sewing machine or heavy-duty thread. For metal zippers, ensure the teeth align with the backpack’s edges to prevent future jams.
3. Seek Professional Help

If the backpack is high-value (e.g., premium outdoor brands, designer styles) or you lack sewing confidence:
- Visit a tailor, luggage repair shop, or backpack specialist (prioritize those experienced with waterproof/zipped designs).
- Call ahead to confirm they can match your zipper type (e.g., specialized teeth or tracks).
4. Replace the Backpack

If the backpack is old, heavily worn, or repair costs exceed 50% of its original value, consider a new one. Look for models with durable zippers (e.g., YKK) and features like reinforced stitching or built-in slider guards to reduce future issues.
If you need further customization and upgrade, Honeyoung, as a backpack factory that tailors zippers (e.g., waterproof, lightweight) and high-performance sliders to your needs (load-bearing, style, function), enhancing practicality and personalization.
How to Prevent Zipper Problems on Your Backpack
A little proactive care can go a long way in keeping your backpack zipper sliding smoothly for years. Here are practical, actionable tips to avoid common zipper issues like jams, broken sliders, or worn teeth:
1. Use Your Zipper Gently
- Avoid forcing: If stuck, don’t yank—pause, clear debris (e.g., threads, rocks), and retry gently.
- Zip correctly: Follow the teeth’s natural curve (align with the “crown” angle) to prevent misalignment.
- Lighten up: Don’t overpack; heavy items strain teeth/sliders—keep loads balanced and centered.
2. Keep It Clean
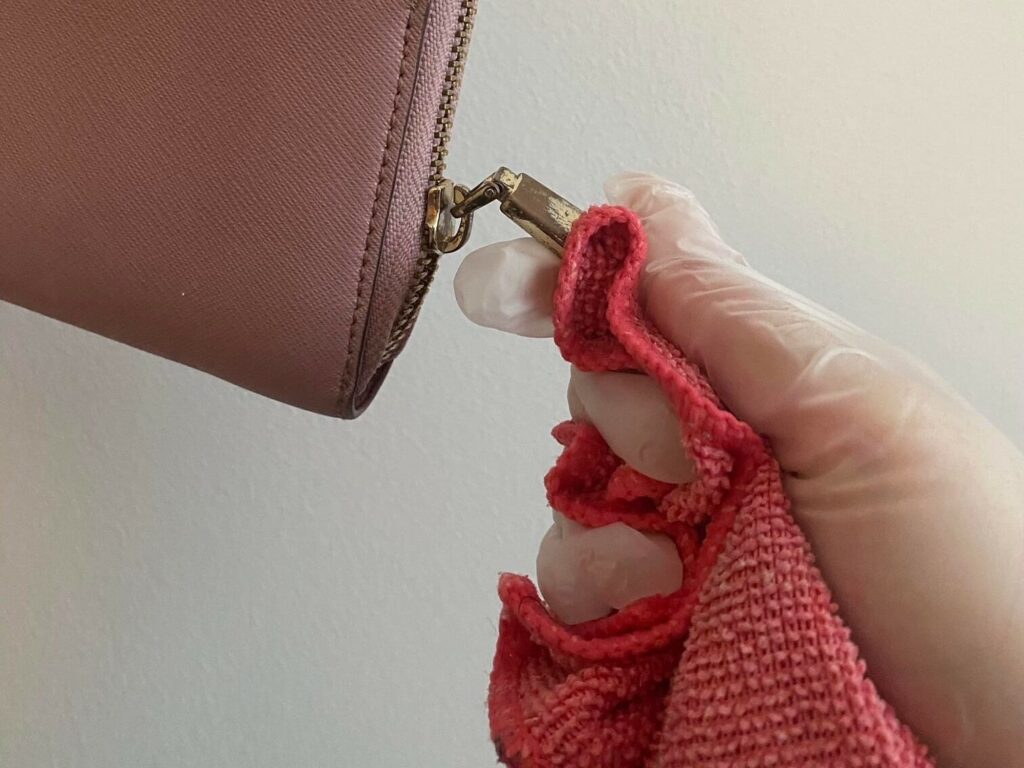
- Regular debris removal: Wipe weekly with a soft dry cloth; use a soft toothbrush to scrub stubborn grime between teeth (dust, lint, sand, crumbs cause friction).
- Monthly deep clean: Metal: Wipe with a damp cloth (no soaking), dry fast to avoid rust. Nylon/plastic: Wash with mild soap (dish soap + water), rinse, pat dry.
(If you want to learn more about cleaning your backpack, check out The Ultimate Guide to How to Wash a Backpack.)
3. Lubricate Strategically
- Proactively lubricate every 3–6 months (more if daily). Use a small amount (WD-40 for metal, beeswax/cooking oil for nylon/plastic) on teeth/slider grooves; rub in, then zip/unzip to spread.
- Avoid excess—too much (especially petroleum-based) attracts dirt; use lightly.
4. Mind the Teeth
- Fix minor bends quickly: Use needle-nose pliers (metal) or thumbnail (nylon) to gently straighten slightly bent teeth—small bends worsen if ignored.
- Avoid sharp objects: Keys, pens, etc., can scratch/chip teeth; store separately to prevent collisions.
5. Store Your Backpack Properly
- Fully close before storing: Exposed teeth may catch items, causing bends/breaks.
- Dry first: Air-dry completely before zipping—wet zippers rust (metal) or mold (nylon).
- Hang/fold gently: Avoid cramming—warp alignment. Hang loosely or fold to keep shape.
6. Material-Specific Care
- Metal zippers: Wipe dry after rain or sweat, and avoid contact with chemicals (e.g., perfume, sunscreen) that can corrode the metal.
- Nylon/plastic zippers: Keep away from heat sources (radiators, direct sunlight) to prevent melting. Avoid harsh cleaners (e.g., bleach) that can crack the plastic.
Prevention is about consistency. By making these small habits part of your backpack routine—gentle use, regular cleaning, and proactive lubrication—you’ll save yourself from the hassle of frequent repairs and keep your backpack reliable for all your adventures.
Maintenance techniques for zippers made of different materials
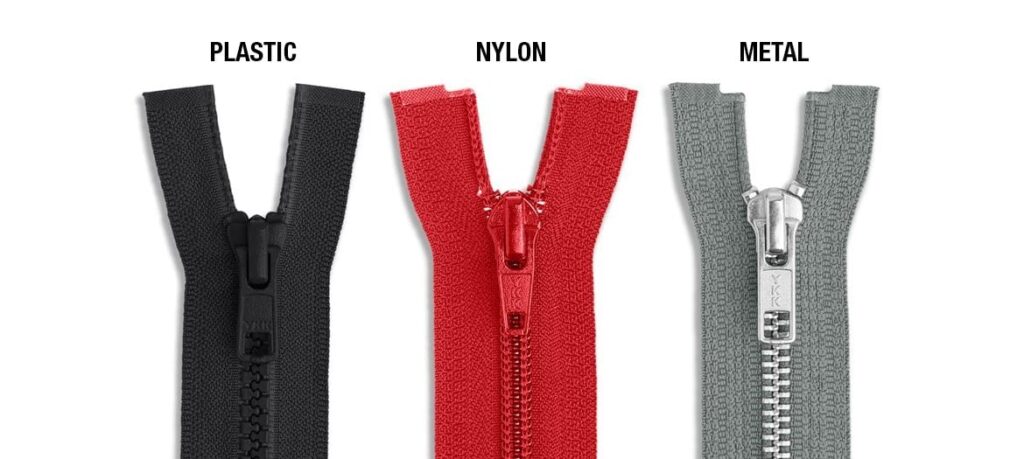
The material of the backpack zipper determines its durability and applicable scenarios (such as daily commuting, outdoor hiking or waterproof needs), and targeted maintenance can greatly extend its life.
The following are special maintenance tips for three common materials: metal zippers, nylon/plastic zippers, and waterproof coating zippers.
Metal Zippers: Focus on Moisture & Scratch Prevention
Metal zippers (common in outdoor backpacks) need moisture control to avoid rust and gentle handling to prevent cracks.
Wipe dry immediately if wet, avoid contact with water/oil/chemicals, and use WD-40 for lubrication (avoid thick greases). Never force-bending—metal teeth are brittle.
Nylon/Plastic Zippers: Guard Against Heat & Chemicals
Nylon/plastic zippers (lightweight backpacks) hate heat and solvents. Keep away from direct sunlight/hot surfaces to prevent melting, and avoid sharp objects that scratch.
Clean with mild soap/water; use beeswax or cooking oil for lubrication (no harsh chemicals like alcohol).
Waterproof Coated Zippers (PVC/TPU): Protect the Coating
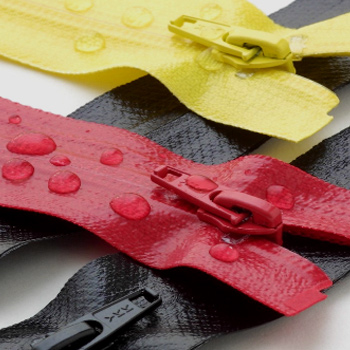
Waterproof zippers rely on their coating for a seal. Avoid rough pulling to prevent coating tears, clean gently with a soft cloth/water, and never use hard brushes.
For stiffness, use a tiny amount of silicone spray (avoid oils that dissolve the coating).
Summarize
A broken zipper doesn’t mean the end of your backpack! Most common issues like sticking, misalignment, or a loose slider can be fixed with simple household items like pliers, soap, or a pencil. For quick fixes, try lubricating with graphite or using a paperclip as a temporary pull.
Prevent future problems by not overstuffing your bag and occasionally cleaning the zipper teeth. Different materials need different care – wax metal zippers, keep plastic ones clean, and avoid forcing coil zippers.
With these easy solutions, you can extend your backpack’s life and avoid frustrating zipper jams. A little maintenance saves money and keeps your gear reliable!


